


Status.cafe fix for new Neocities accounts
( Surfing-Waves RSS widget guide )
4m read, a basic guide targeted towards novice coders and people who don't know what an RSS feed is (me)

19/05/2024 — First I just wanted to thank softteddypaws here on Neocities, without her I probably never would've thought to try this and most likely would've given up on status.cafe entirely ( ´ヮ`)b
I also wanted to give a disclaimer that these concepts are very new to me, so my explanation of how they actually work may sound funny or be slightly
inaccurate (・ω・#)
Click here to jump straight to the tutorial
The purpose of this guide is to allow Neocities users with accounts made after Jan 1, 2024 to integrate status.cafe using an RSS feed widget as a workaround.
If you don't know, status.cafe is a site that allows you to post short statuses, which then show up on the homepage next to everybody else's posts, as well as on your own personal feed. Normally the way it works is that you make your account and then copy and paste the code provided on the site to add the widget to your homepage. You should then get a nice little customizable container displaying your most recent status and the time ago it was posted.
This is such a cool concept and it's one of the first things I wanted to add to my site - I love the home feed of everyone's statuses mixed together, I love that there's no liking or replying so you're only motivated to post for yourself, I love the feeling of connectedness you get seeing lots of different people's statuses embedded into their unique websites, I love that it's a bit retro, and I love status.cafe in particular because I get to join in on that and update my status from my phone, anywhere I want without the need for html editing.
It's a great tool, which is why it sucks that if you made your Neocities account in 2024, you're not going to be able to use the widget unless you pay. Cross-origin resource sharing (CORS) restrictions and a stricter content security policy are enforced on these newer accounts in order to cut down on malicious misuse and phishing attempts, and as of writing you can only regain CORS support by upgrading your Neocities account to supporter tier. This means your site isn't allowed to retrieve data from status.cafe to display statuses, and it also can't do things like interact with Google Sheets to host a HTML comment box.
Luckily, thanks to surfing-waves.com, there's a free and easy workaround for status.cafe integration using their RSS feed widget (others probably work too, but Surfing Waves is the one I use and it's also very user friendly). My best guess as to why this works would probably be because the script from status.cafe attempts to fetch data from other files, whereas the surfing-waves script is self contained (although I really don't know javascript so I can't tell ( ̄∀ ̄;) )

The Guide
1. Go to surfing-waves.com/feed.htm.
2. Take the link to your status.cafe page (should look like “https://status.cafe/users/yourname”) and add “.atom” to the end. This should give you the link to your status.cafe RSS feed (“https://status.cafe/users/yourname.atom”) which, if opened, should just display a bunch of code.
Paste this link into the “Add Feeds” section (first section) and your statuses should show up in the live preview on the right (it might take a second to register).
3. Ignore all customization options for now, expand the “General settings” section (second section), and paste a link to your site’s custom style sheet (should look like “https://yoursite.neocities.org/style.css”) at the bottom, under “URL of Custom CSS”.
You’ll use the stylesheet hosted on your website to customise the font, font size, the colours of the text and the widget background. The header of your status will be a link (“<a>”) and the content will be <body>, not <p>, so style <a> and <body> however you want the title and content to appear accordingly - you can also make a new, separate CSS file for the widget if you want it to look different from the rest of your site.
If you save the CSS file, then go back to surfing-waves.com, it’ll update accordingly, so feel free to go back and forth tweaking things until it looks right.
Also, if you import your font and don’t host it on your site (like me), and especially if you didn’t know what you were doing at first (like me), you’ll have to copy this code into your CSS file to get your custom font to work.
@font-face {

                  font-family: fontname;

                  src: url("https://fonts.cdnfonts.com/s/19946/OnliLight.woff");

                }
Replace “fontname” with the name of the font and replace the placeholder link with the link to the font file you want to use. This has to be a link to the actual font file (i.e. fontname.ttf, fontname.otf, fontname.woff), which you should be able to find on the font’s website or by looking at its CSS.
4. When you’re done with the CSS styling, go back to the customization options on surfing-waves.com and expand the “Entry title” section (4th section). Change the “maximum length” value to the length of your username plus 2 (for the emoji).
5. Finally, go to “Entry contents” (the 5th section) and increase the maximum length value so it’ll show your full statuses (I set it to 160, it might be slightly overkill but it works) and set “Posted time ago” to on.
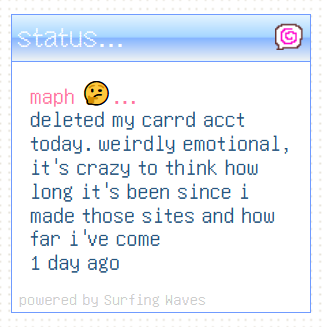
Now the widget should show your username, mood, status and post date, and you’re free to customize the rest of the settings to your preference. Keep in mind that if you ever change your mind about a certain setting, the widget code is written plainly and is easy to edit directly.
Some settings you might want to mess around with:
- In “general settings”:
- In “main title”:
- In “entry title”:
Also note that while there are no options for customizing the Surfing Waves link at the bottom, it’s very easy to edit the code to change the colour/alignment etc. to your preference.
Now, if everything went right, you’ll have a status.cafe widget that looks almost identical to the original one! Send your support to surfing-waves.com if you can since they’ve had this widget free since 2013, spread the word if you see someone else facing the same problem and if you’re confused or run into any issues with the tutorial, let me know! Happy posting! :)
